


Runner’s knee has a sneaky way of turning simple stuff, stairs, squats, even sitting through a movie, into a “why does my knee hate me?” moment.
If that ache is hanging out around the kneecap (or feels like it’s hiding behind it), this blog is here to help make sense of it.
You’ll learn what runner’s knee really is, why it happens (even to non-runners), and the most common triggers like doing too much too fast, weak hips and quads, tight leg muscles, and form slip-ups.
We will walk through a quick 10–15 minute routine that’s easy to stick with: a warm-up, the best strengthening moves, the most helpful stretches, and a simple weekly plan.
It also covers what to avoid during a flare-up and when it’s time to see a PT or doctor.
What is Runner’s Knee?
Runner’s knee isn’t just for runners; plenty of cyclists, gym-goers, and even people who sit a lot deal with it too.
Where it Hurts: Usually right in front of your knee or around the kneecap. Sometimes it feels like the pain is coming from behind the kneecap itself.
What’s Actually Happening: The kneecap (patella) isn’t tracking smoothly over your thigh bone. This creates friction and irritation, especially when you bend your knee, such as going up stairs, squatting, or running.
Who Gets It: Active people who suddenly increase their training, but also folks who have weak hips or tight leg muscles. Even sitting for long periods with bent knees can trigger it.
Common Causes & Triggers
Your knee doesn’t hurt for no reason. Here are the usual suspects:
- Overuse: Jumping up your running mileage too fast, adding lots of hills, or climbing stairs repeatedly
- Weak Muscles: Especially weak hips, glutes, and quads that can’t support proper knee alignment
- Tight Muscles: Tight hip flexors, quads, hamstrings, or calves pull things out of whack
- Form Problems: Knees caving inward when you run or squat, or landing too hard on your heels
Your Runner’s Knee Routine (10–15 Minutes)
Think of this routine as your daily medicine for knee pain. It doesn’t take long, but consistency is what makes it work.
| Step | What to do | Examples / Notes |
|---|---|---|
| Warm-Up (5–10 minutes) | Don’t stretch cold muscles. Start by getting blood flowing and prep your muscles. | Brisk walk around the block or easy cycling on a stationary bike |
| Strength First (Main rehab) | Pick 3–5 strengthening exercises and do them first. | Strength comes before stretching because it builds support for the knee (where the real rehab happens). |
| Stretch After (Cooldown) | Pick 3–5 stretches to finish. | Stretching after strength helps muscles relax and lengthen what’s tight. |
| Pain rule (Always) | Mild discomfort is okay. Sharp, stabbing pain is not. | If you feel sharp pain, stop and scale back or switch the move. |
Best Runners’ Knee Stretches & Strengthening Exercises
These stretches and exercises help ease runner’s knee by improving hip, quad, and hamstring mobility, plus better kneecap tracking and stronger support muscles.
1. Low Lunge Hip Flexor Stretch
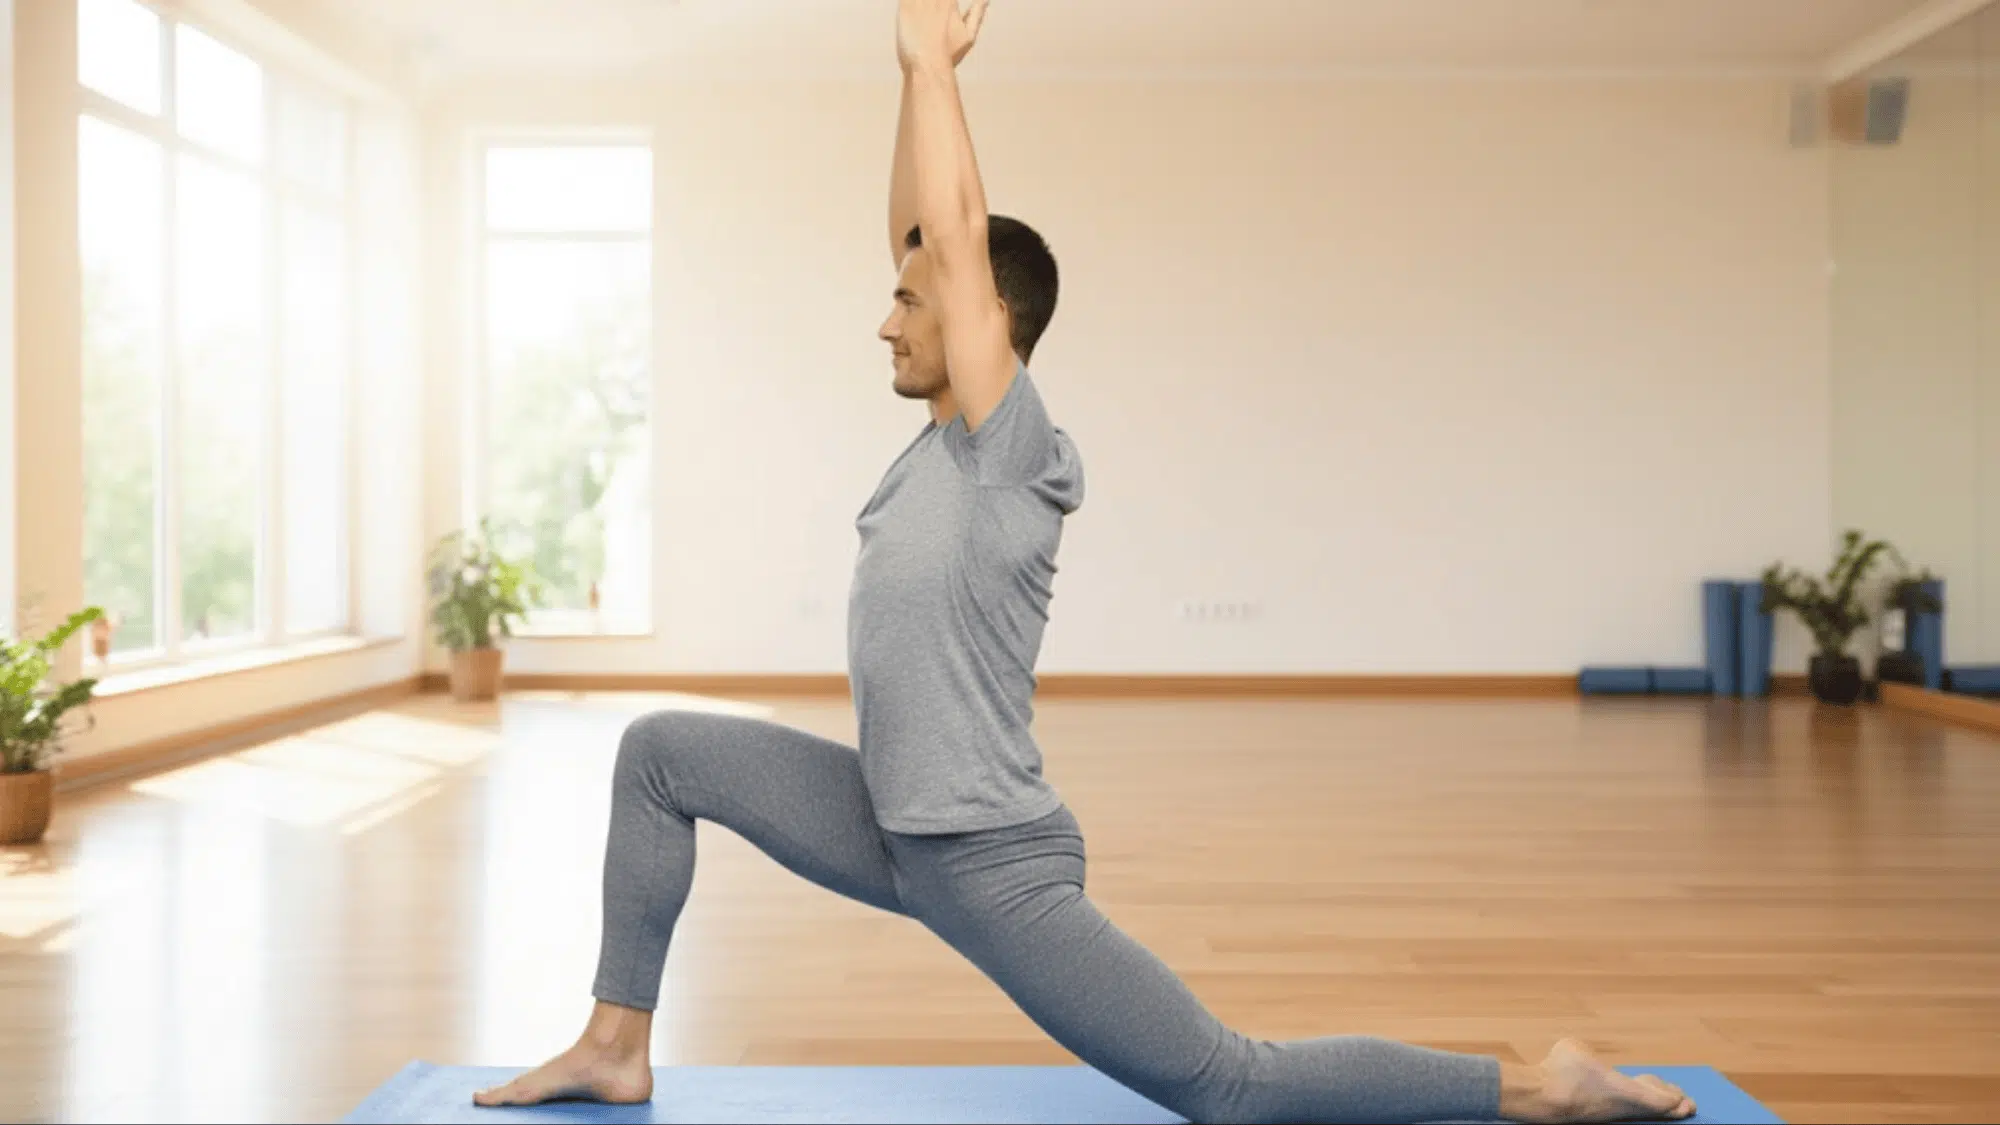
What it does: Loosens the front of your hip, which can reduce pressure on your kneecap.
How to do it:
- Start in a lunge position with your right foot forward and left knee on the ground (use a mat or towel for comfort)
- Keep your torso upright and gently squeeze your left glute
- Lean your hips forward slightly until you feel a stretch in the front of your left hip
- Don’t let your lower back arch; think “ribs down.”
What you should feel: A gentle pull in the front of your back hip, not in your knee.
Common mistake: Arching your lower back too much. This takes the stretch out of your hip and puts stress on your spine.
2. Standing Quadriceps Stretch
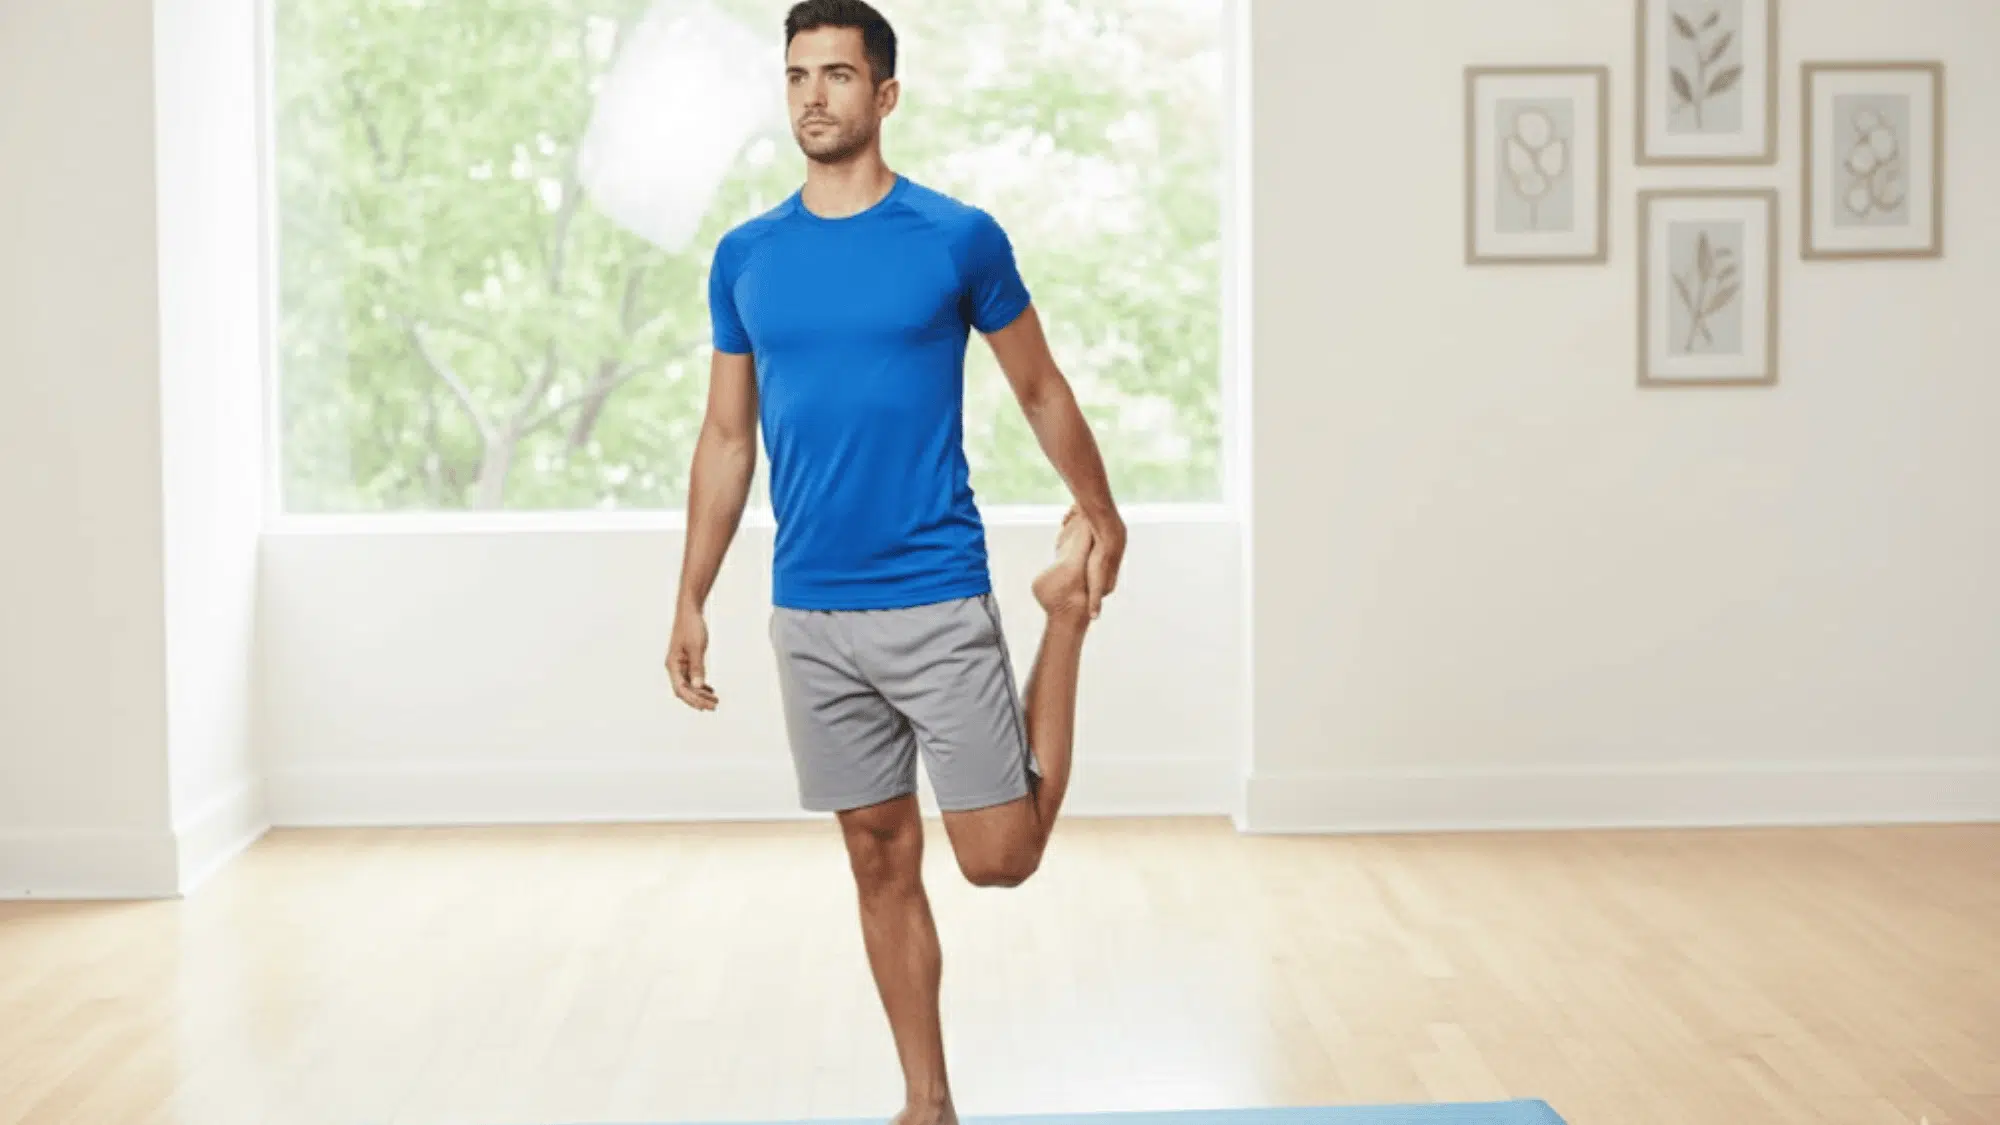
What it does: Stretches your quads (front thigh muscles) that attach to your kneecap.
How to do it:
- Stand on your left leg (hold a wall for balance if needed)
- Bend your right knee and grab your right ankle behind you
- Keep both knees close together and your pelvis neutral
- Gently pull your heel toward your butt
What you should feel: A stretch down the front of your thigh.
Common mistake: Letting your knee drift forward or arching your back. Keep everything stacked and controlled.
3. Hamstring Stretch (Seated or With a Strap)
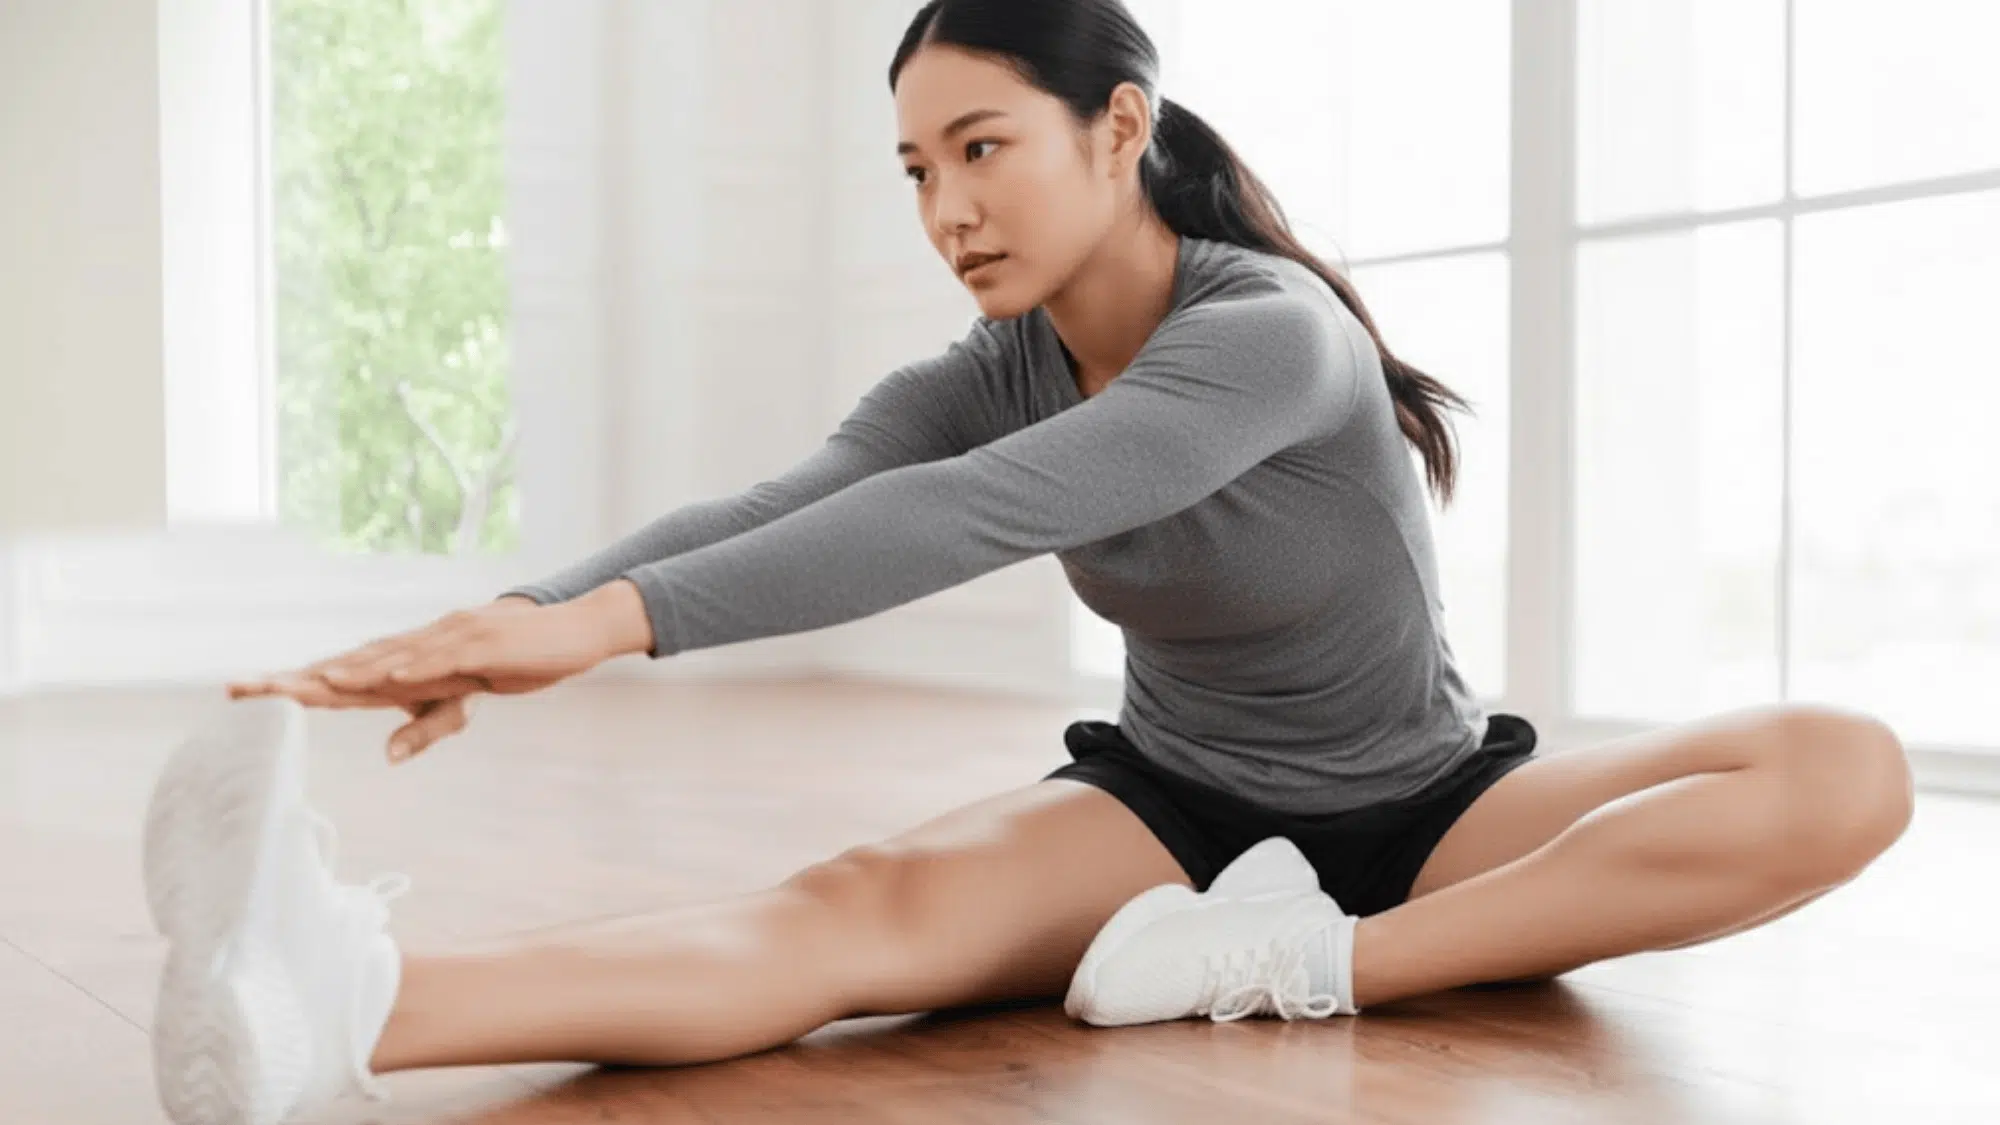
What it does: Loosens tight hamstrings, which can affect how your knee moves.
How to do it:
- Sit on the floor with your right leg straight and left leg bent (or both straight)
- Keep your back straight and flex your right foot (toes toward you)
- Lean forward from your hips (not your waist) until you feel a stretch
- Or lie on your back, loop a strap or towel around your foot, and straighten your leg toward the ceiling
What you should feel: A pull along the back of your thigh.
Common mistake: Rounding your back or bouncing. Keep it smooth and controlled.
4. Standing IT Band / TFL Side Lean Stretch
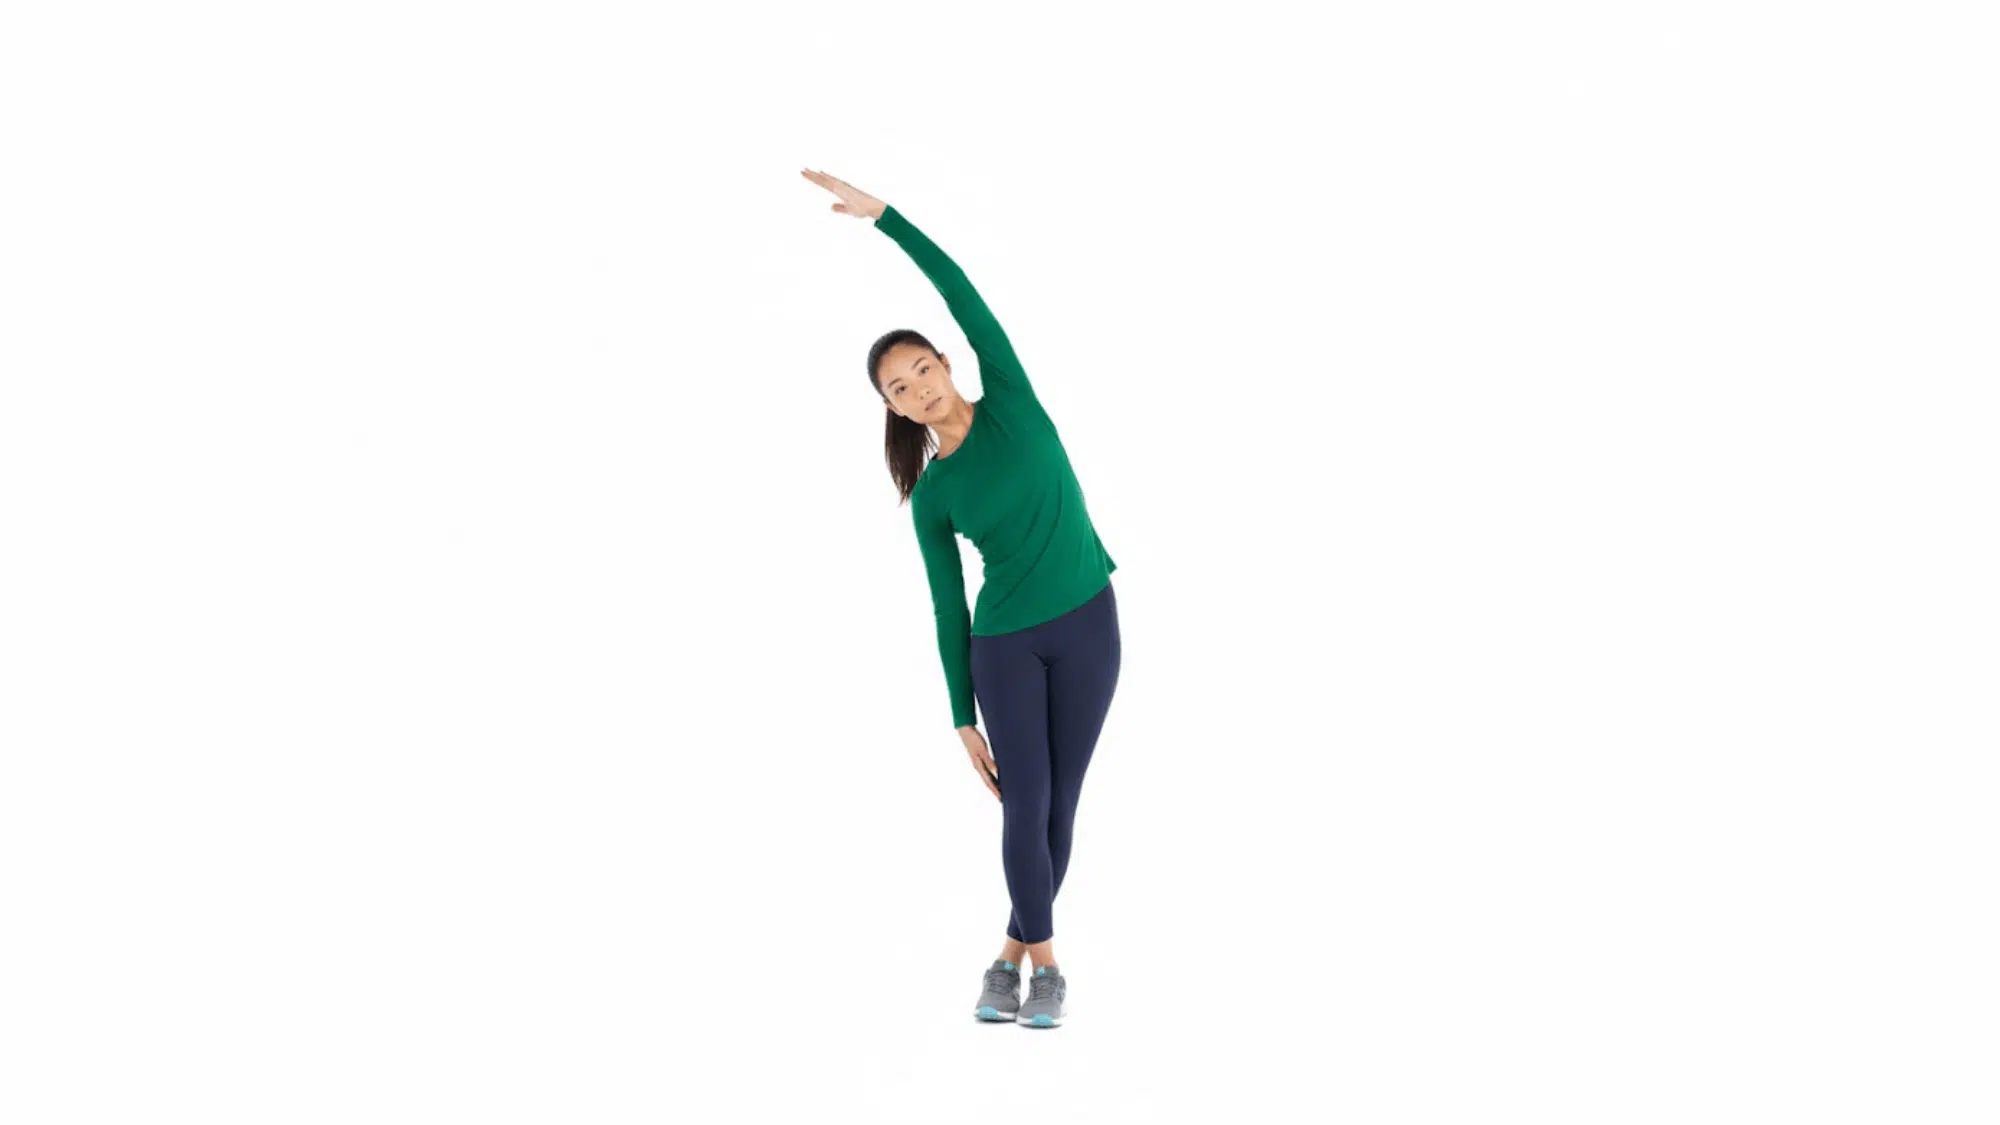
What it does: Targets the tensor fasciae latae (TFL) and outer hip, which connects to your IT band.
How to do it:
- Stand with your right leg crossed behind your left
- Raise your right arm overhead
- Lean your upper body to the left, creating a “C” shape with your body
- Push your right hip slightly outward
What you should feel: A stretch along the outside of your right hip and thigh.
Common mistake: Bending forward or backward instead of leaning directly to the side.
5. Wall Calf Stretch

What it does: Stretches your calf and Achilles tendon, which can affect your entire leg alignment.
How to do it:
- Stand facing a wall with your right foot back and left foot forward
- Keep your right heel on the ground and right leg straight
- Lean forward into the wall, keeping your hips square
What you should feel: A stretch in your right calf.
Common mistake: Letting your back heel lift up or turning your foot outward.
Optional add-on: Try a Figure-4 glute stretch if your hips feel super locked up. Lie on your back, cross one ankle over the opposite knee, and pull the bottom leg toward your chest.
6. Clamshells (Hip Abductors/External Rotators)
What it does: Strengthens the muscles on the outside of your hip that control how your knee tracks.
How to do it:
- Lie on your side with knees bent at 90 degrees, feet together
- Keep your feet touching and lift your top knee up like a clamshell opening
- Lower with control
Dosage: 10–20 reps per side, 2–3 sets
Progression: Add a mini resistance band just above your knees.
Common mistake: Rolling your hips backward. Keep them stacked and stable.
7. Straight Leg Raises (Quad Control)
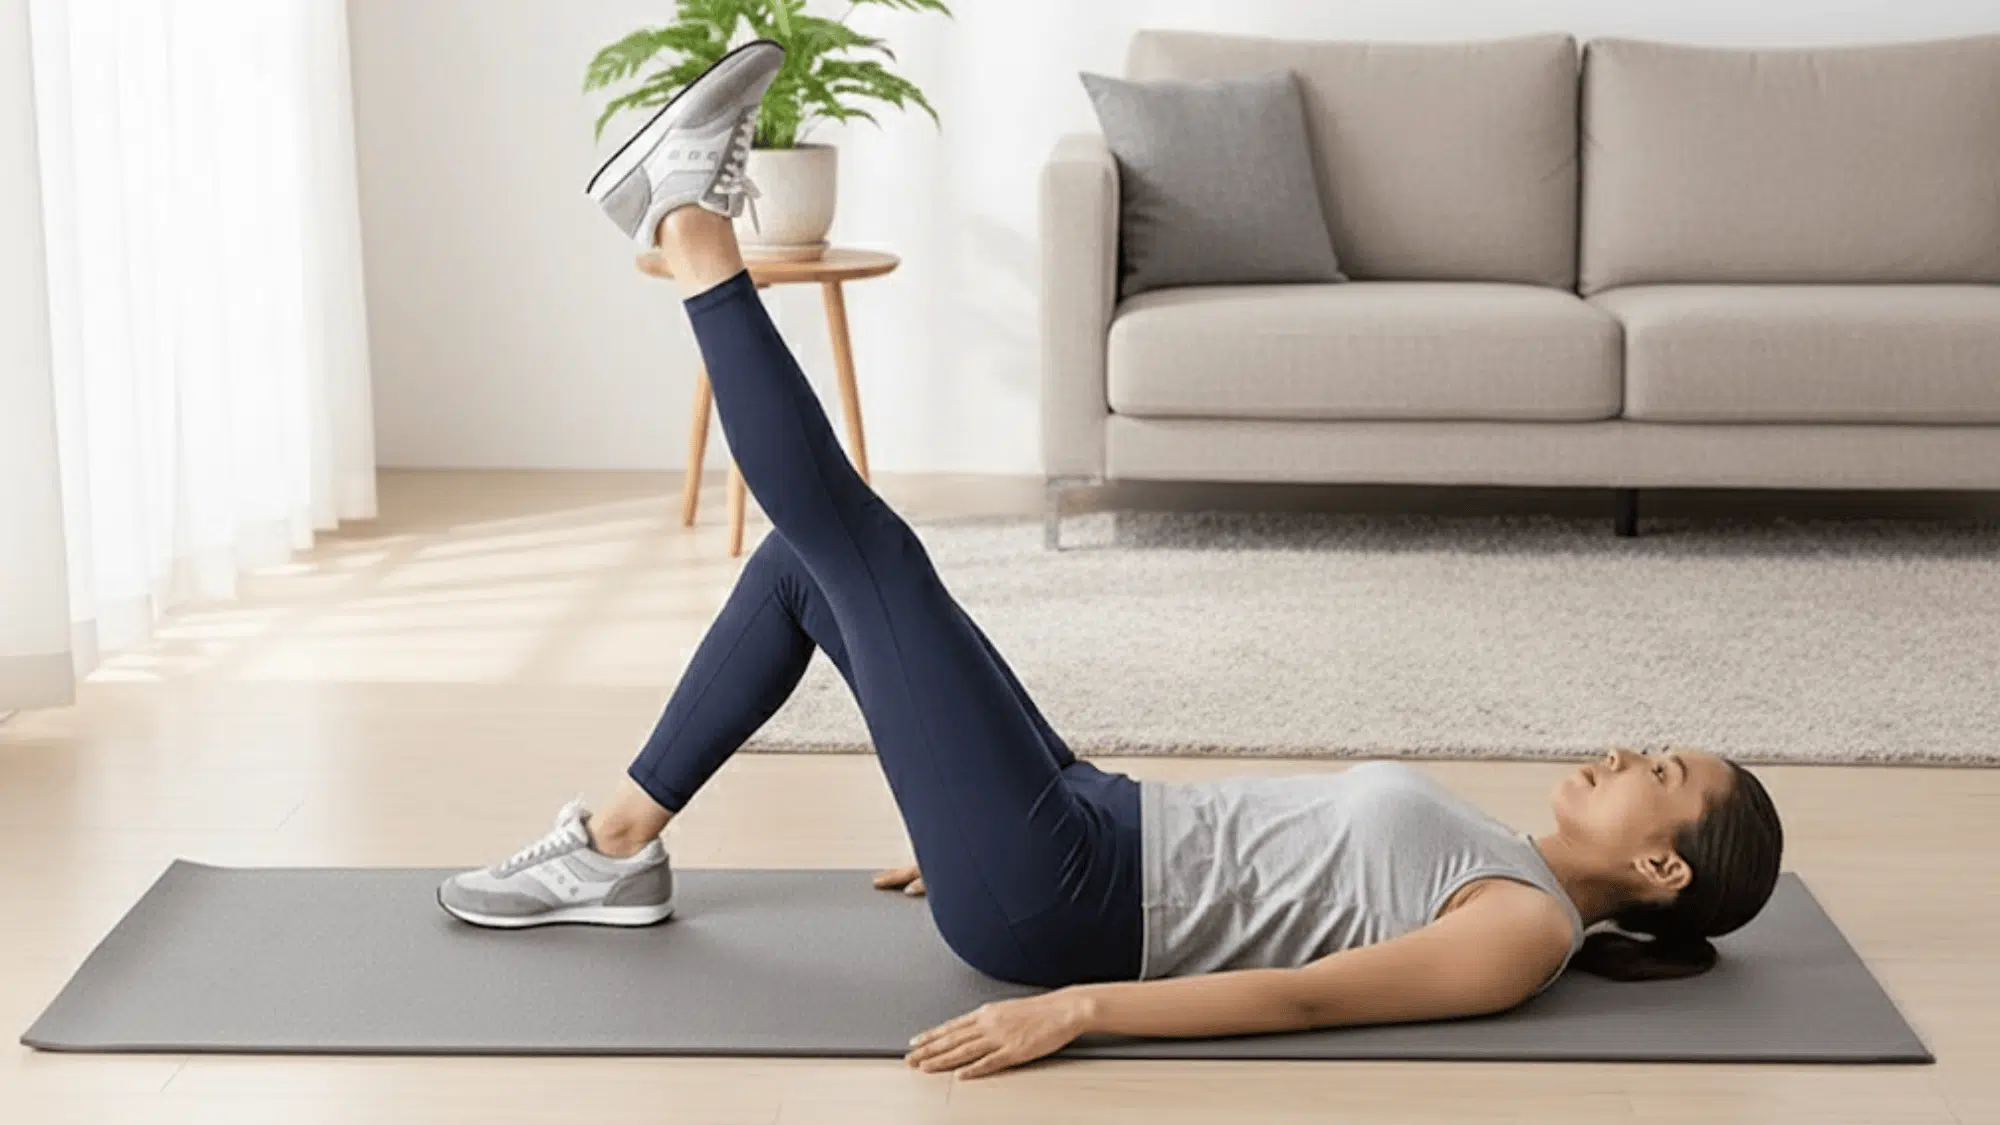
What it does: Builds quad strength without bending your knee much, perfect for early rehab.
How to do it:
- Lie on your back with your left knee bent and right leg straight
- Tighten your right quad (make your kneecap pull up)
- Lift your right leg to the height of your left knee
- Lower slowly
Dosage: 10–12 reps per side, 2–3 sets
Key cue: Really squeeze that quad before you lift. Don’t let your hip rock side to side.
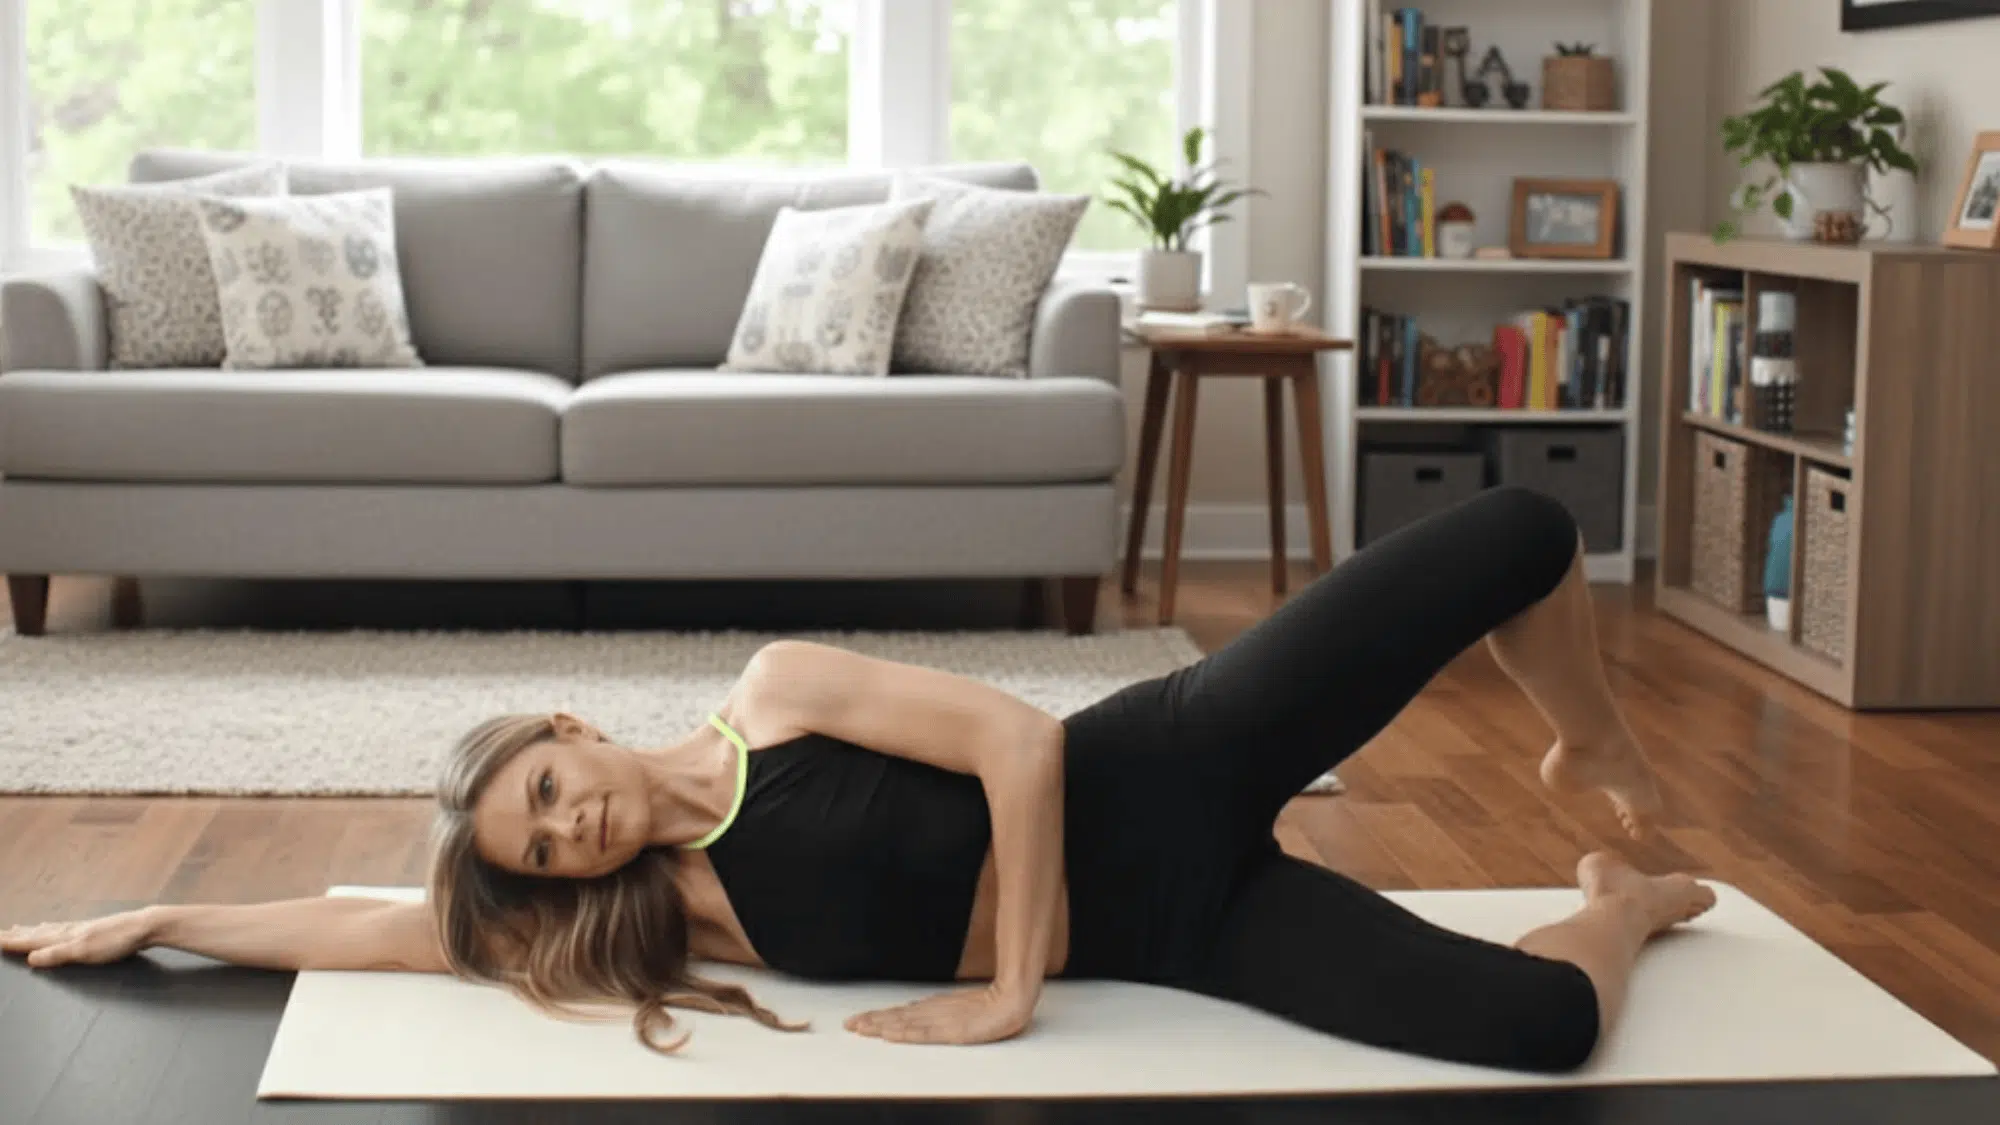
8. Side-Lying Leg Lifts (Glute Medius)
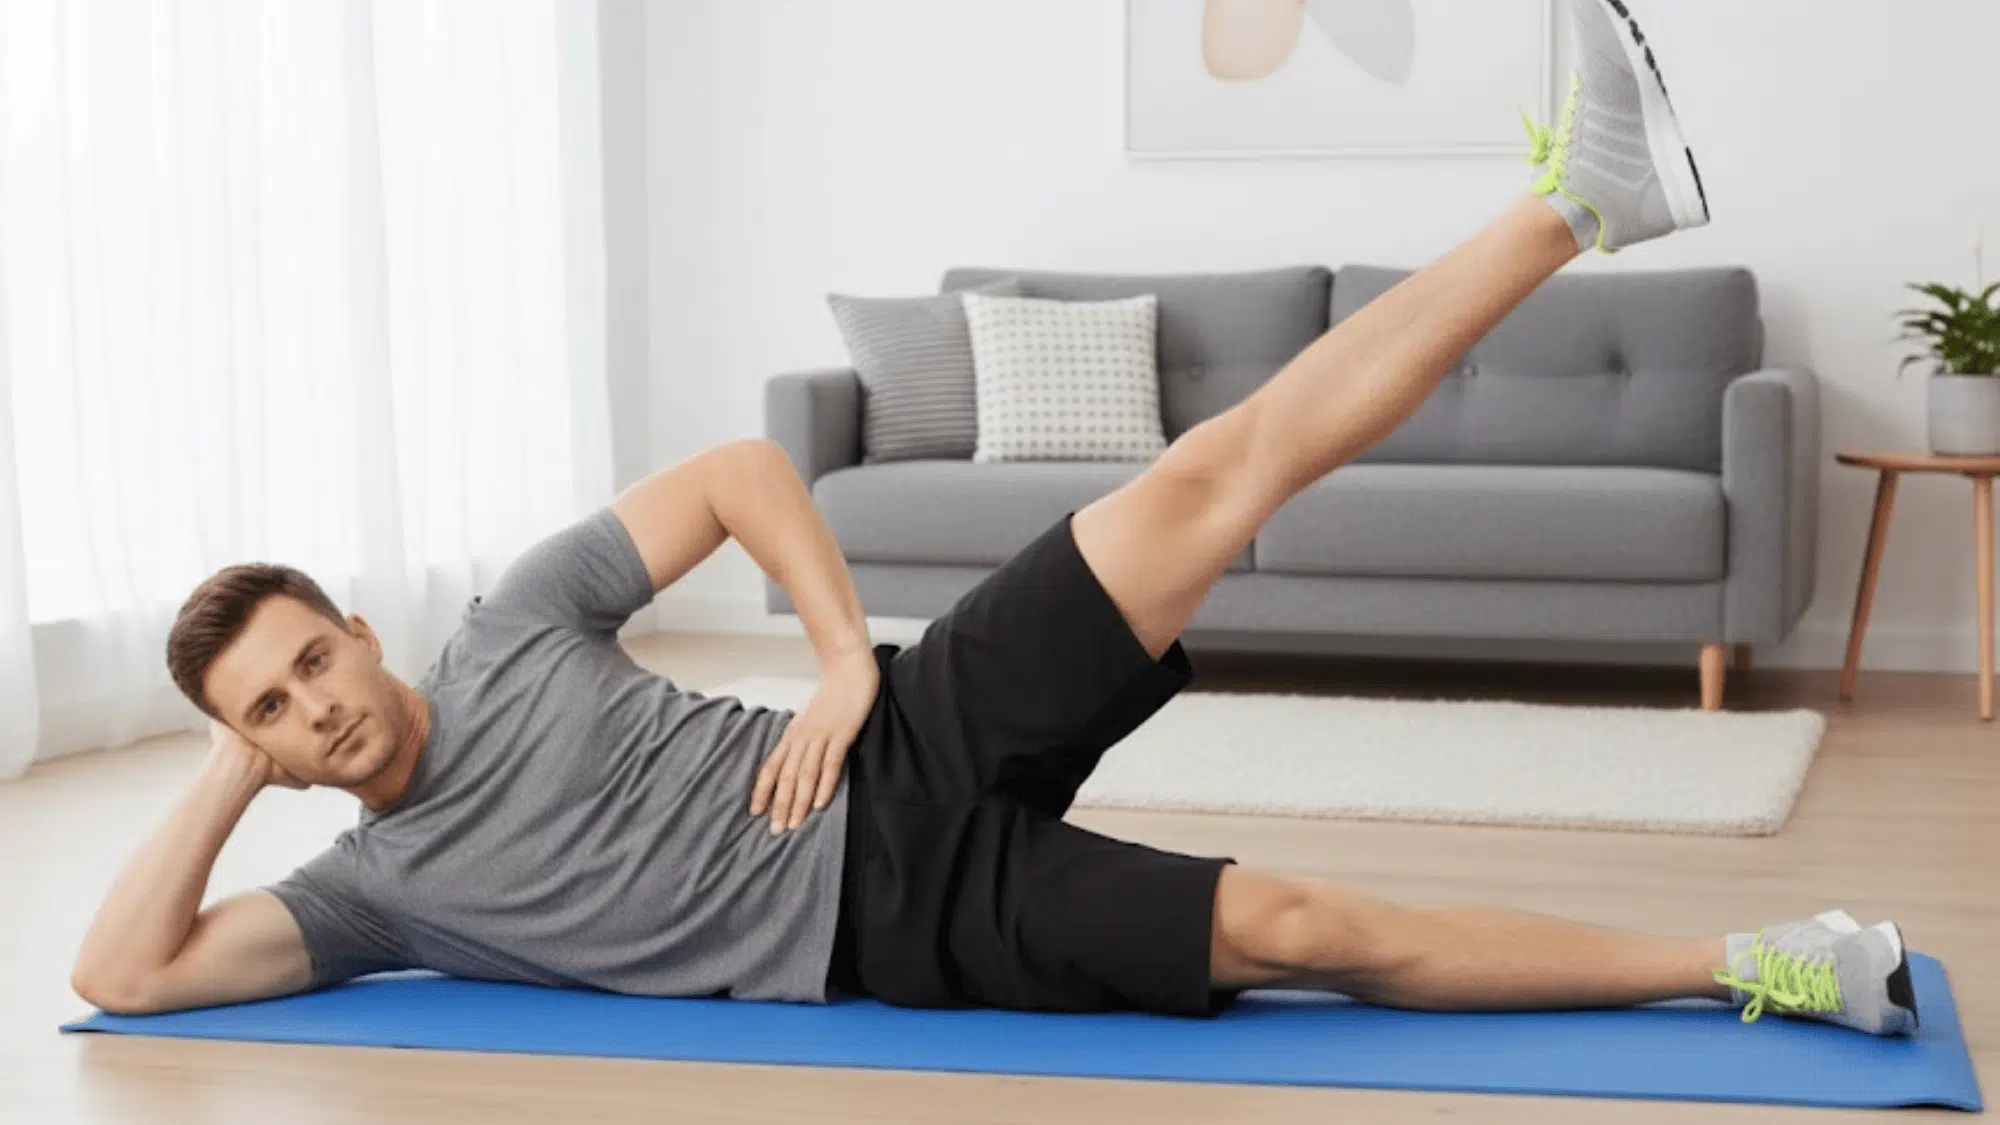
What it does: Targets your glute medius, a key stabilizer that keeps your knee from caving inward.
How to do it:
- Lie on your side with your bottom leg slightly bent and your top leg straight
- Point your top toes slightly downward and lift your leg up
- Lead with your heel, not your toes
- Lower with control
Dosage: 10–12 reps per side, 2–3 sets
Common mistake: Rolling backward. Keep your body in a straight line.
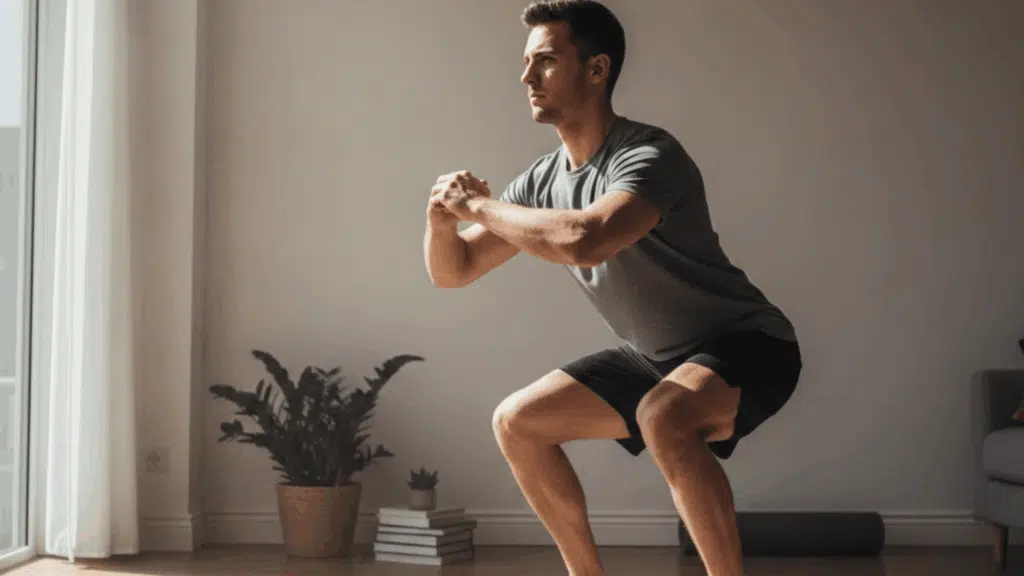
9. Wall Sit (Quad Endurance)

What it does: Builds endurance in your quads to support your knee during activities.
How to do it:
- Stand with your back against a wall
- Slide down until your thighs are roughly parallel to the floor (or higher if that’s too much)
- Keep your knees behind your toes and your back flat against the wall
- Hold steady
Dosage: 20–30 seconds, work up to 60 seconds, repeat 3 times
Progression: Hold light dumbbells in your hands.
10. Step-Ups (Glutes + Quads + Control)
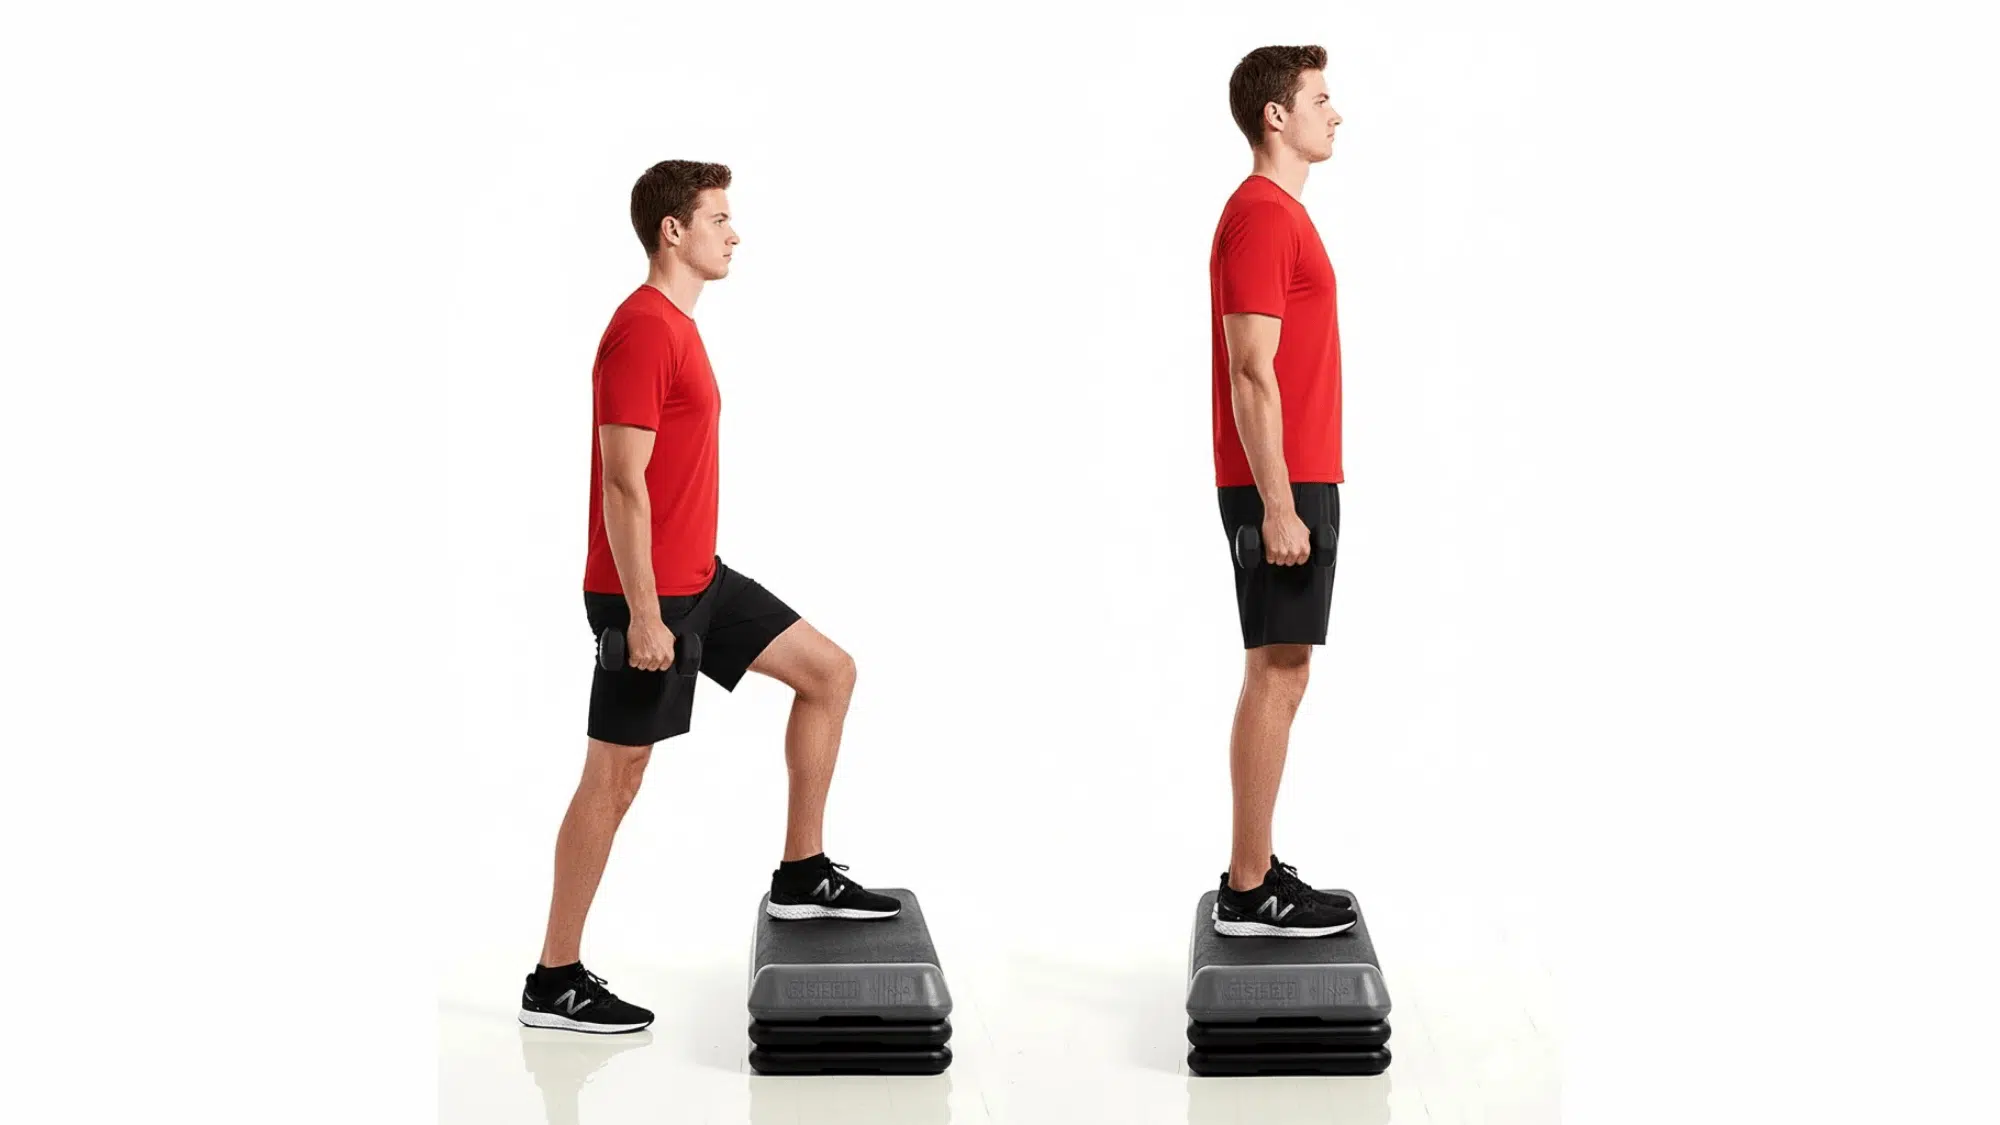
What it does: Combines strength and control in a functional movement pattern.
How to do it:
- Stand in front of a step or box (start with 6–8 inches)
- Place your right foot on the step
- Push through your right heel to step up, bringing your left foot to meet it
- Step back down with control
Dosage: 10–20 reps per side, 2–3 sets
Regression: Use a lower step or hold onto something for balance.
Key cue: Watch your knee, it should track over your mid-foot, not cave inward.
Simple Weekly Schedule
Consistency beats intensity every time. Here’s how to structure your week:
Daily (5–8 minutes):
- Pick 3 stretches
- Add 1–2 light strength moves
3 times per week (10–15 minutes):
- Full strength circuit (all 5 exercises)
- Stretch cooldown
Running modifications:
- Stick to flatter routes for now
- Shorten your runs temporarily
- Avoid hills and stairs until pain improves
Progression Rules
Your knee didn’t get hurt overnight, and it won’t heal overnight either. Be patient and progress slowly:
- Increase your running volume by no more than 10% each week
- Add resistance (like a band), time, or reps only when your pain stays calm
- If something hurts more the next day, you pushed too hard, scale back
Mistakes that Keep Runner’s Knee Around
Let’s talk about what doesn’t work:
- Only Stretching: Stretching alone won’t build the strength your knee needs
- Deep Knee Bends Too Early: Save the deep squats and lunges until your knee is stronger
- Running Hills Too Soon: Hills are challenging on your knees. Stick to flat ground during rehab
- Knees Collapsing Inward: This happens during squats, step-ups, and running. Watch your form
- Rushing Through Reps: Slow and controlled always beats fast and sloppy
What to Avoid During a Flare-Up
When your knee is really bothering you, give it a break from:
| What to Avoid | What You Can Do Instead |
|---|---|
| Hills and stairs | Walking on flat ground |
| High-gear cycling (more pressure on the knees) | Swimming or water jogging |
| Deep squats and lunges | Easy cycling in lower gears (only if it doesn’t hurt) |
| Long runs (if they make pain worse) | Your strength and mobility routine |
This is actually the perfect time to focus on building strength and fixing imbalances.
When to Get Help
Most runner’s knee cases improve with consistent rehab. But sometimes you need professional help.
See a Physical Therapist or Doctor if:
- Your pain lasts more than a couple of weeks despite doing the exercises
- You have swelling that won’t go down
- Your knee locks up, gives way, or feels unstable
- The pain started after a fall, twist, or direct hit to your knee
- Pain is severe, sharp, or getting worse instead of better
A physical therapist can give you personalized exercises and hands-on treatment. They can also check if something else is going on.
Wrapping Up
Runner’s knee can be stubborn, but it usually gets better when the knee is supported the right way.
Small daily habits add up fast: keep the hips and thighs strong, loosen tight areas, and pay attention to knee alignment during step-ups, squats, and runs.
On days when the knee feels cranky, swapping hills and deep bends for flatter routes and gentler movement can calm things down without stopping progress.
Most importantly, let pain be a guide; mild discomfort is okay, sharp pain is a red flag. If swelling, locking, or ongoing pain sticks around, getting checked by a pro is the smart move.
Ready to help the knee feel normal again? Start the routine today and stay consistent for the next two weeks.


